• Skip to primary navigation
  • Skip to main content

Edges Like Sea Glass

By Leah LaRocco

  • Home
  • Blog
    • Thoughts On Life
    • House & Home
    • Gardening
    • Travel
    • Hiking
  • Marking The Miles
  • Contact
  • Subscribe

renovation

Home Depot Cabinets Are Crappy! Here’s Why…

March 11, 2015 by Leah Leave a Comment

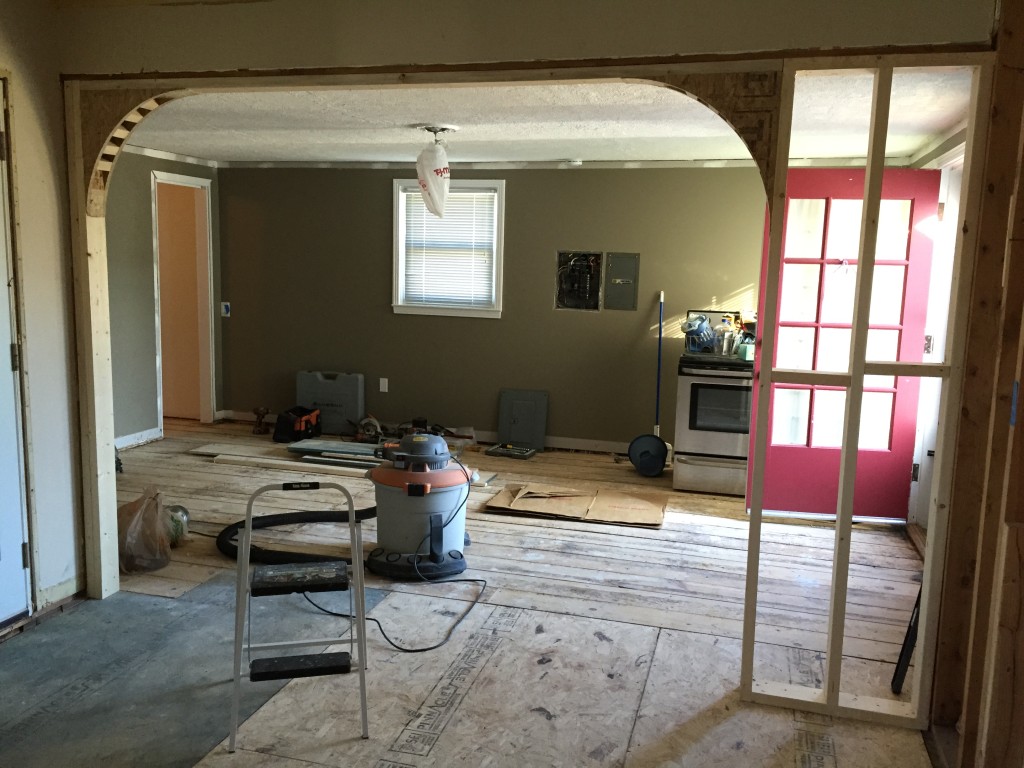
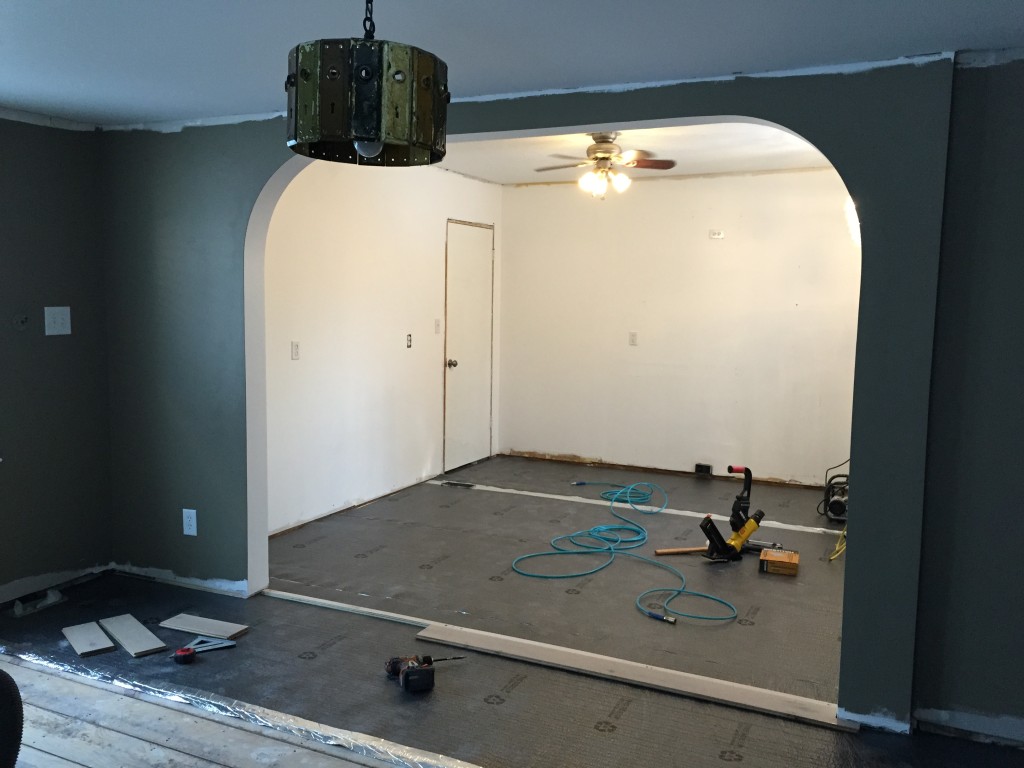
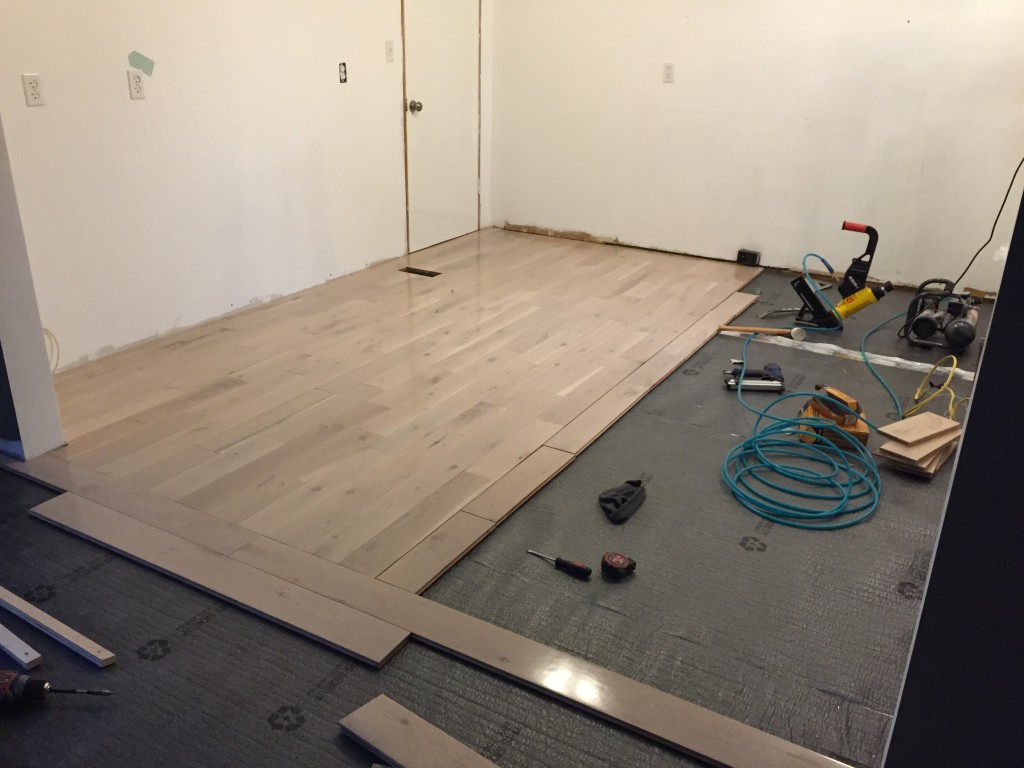
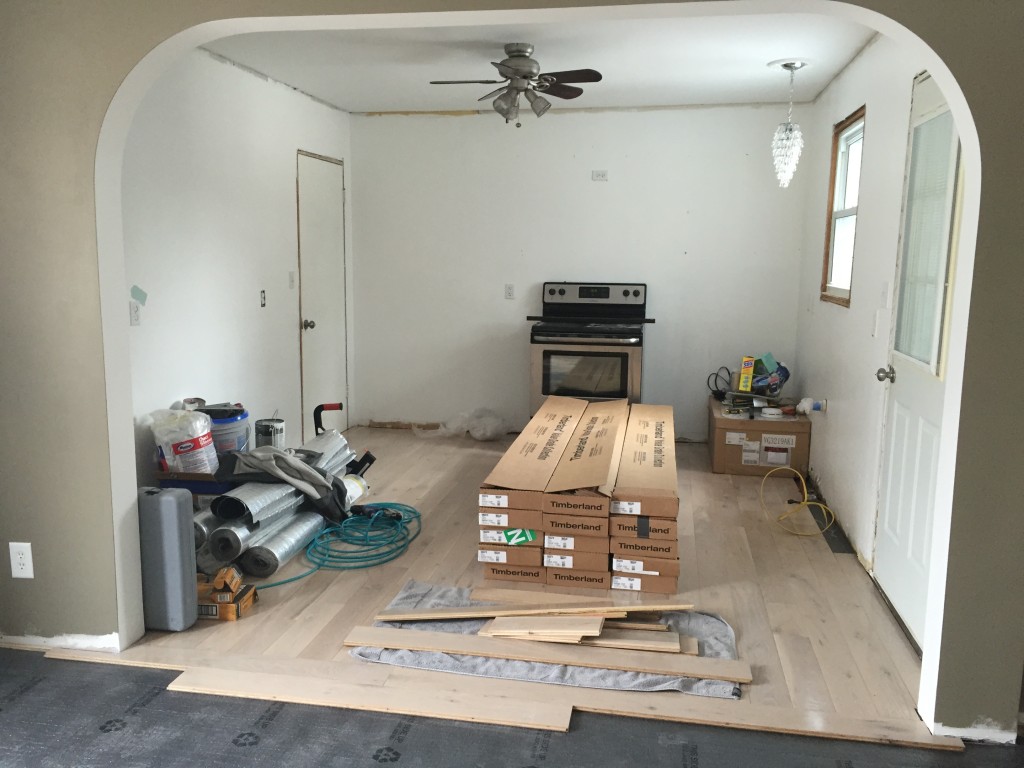
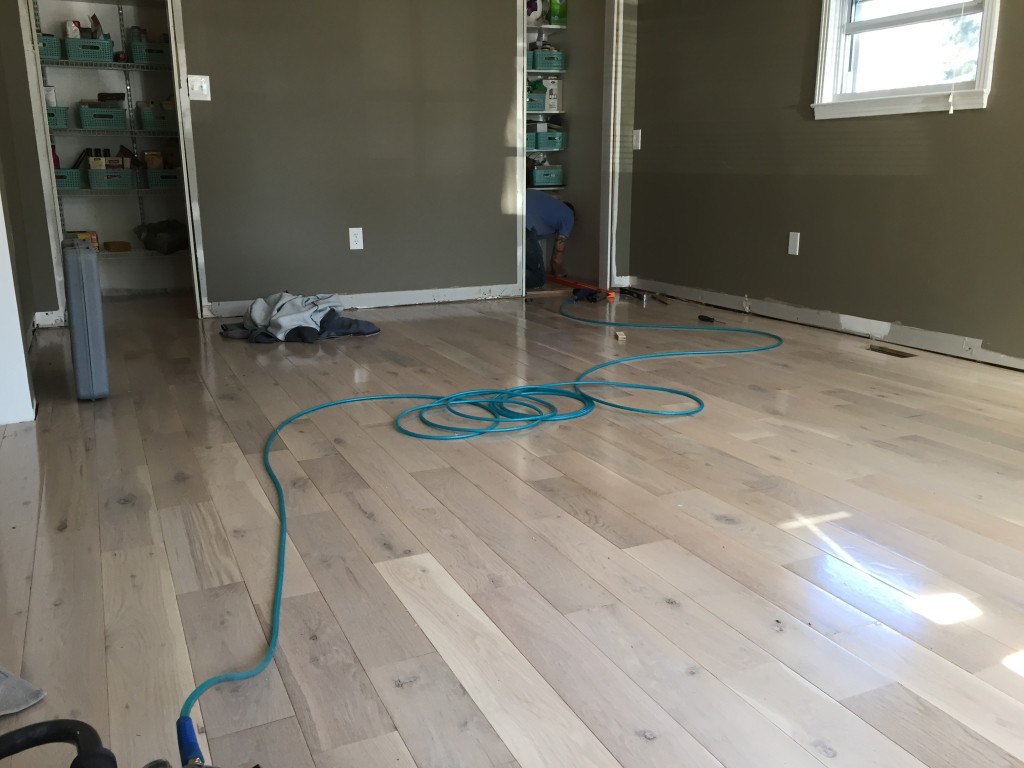
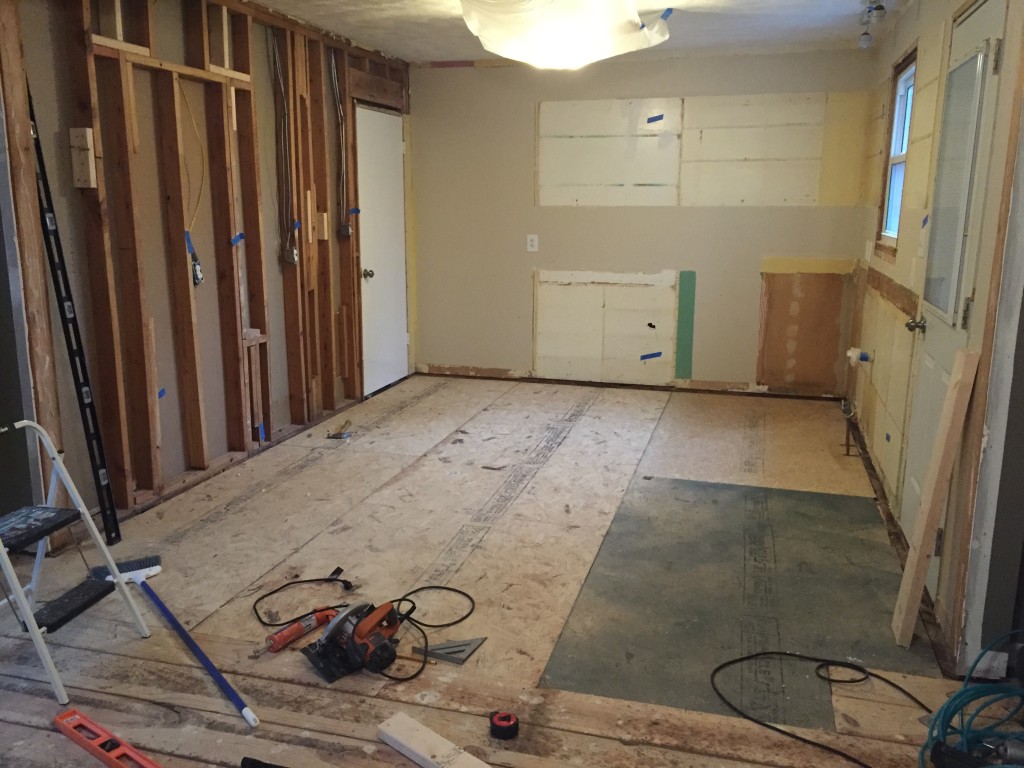
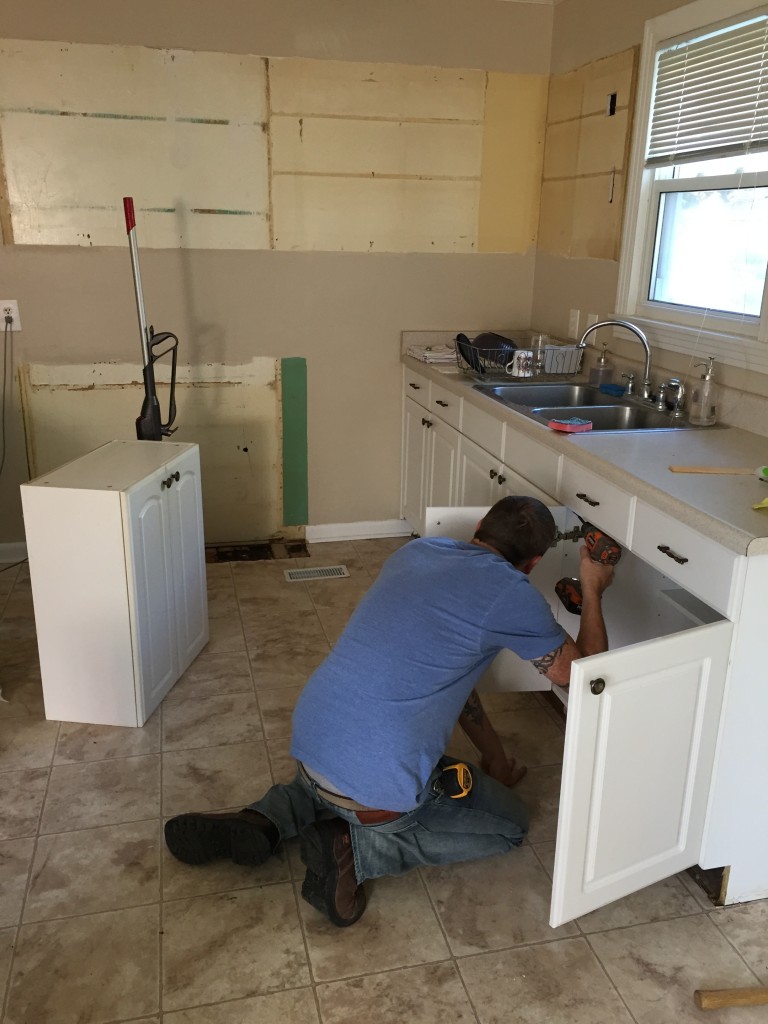
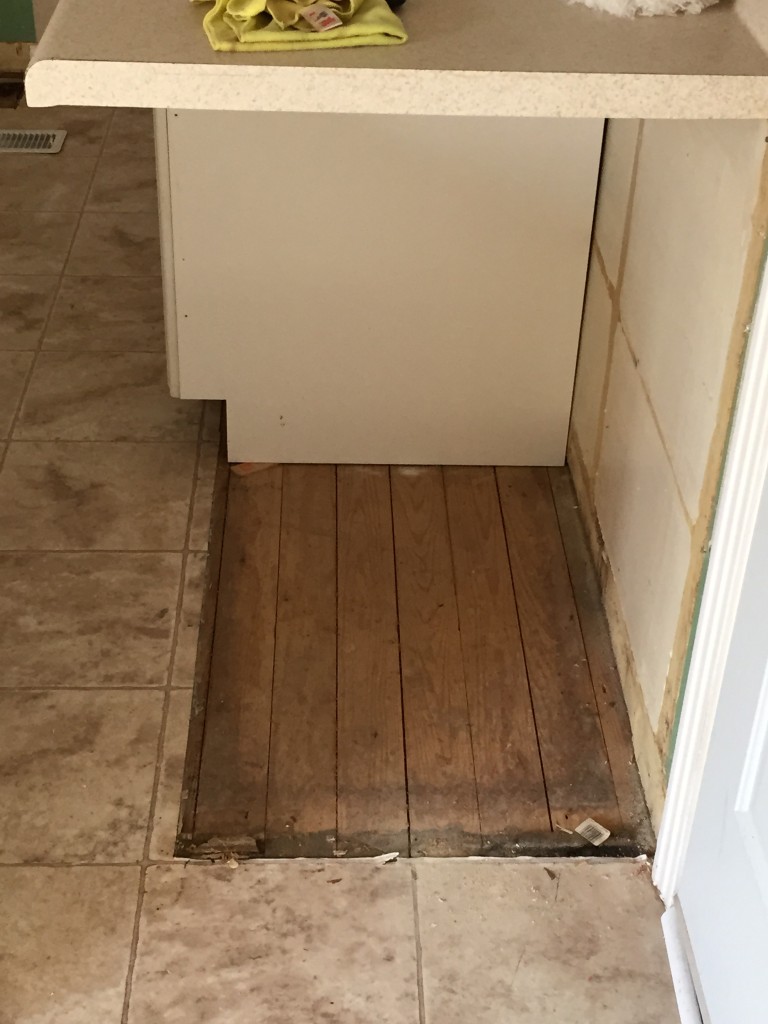
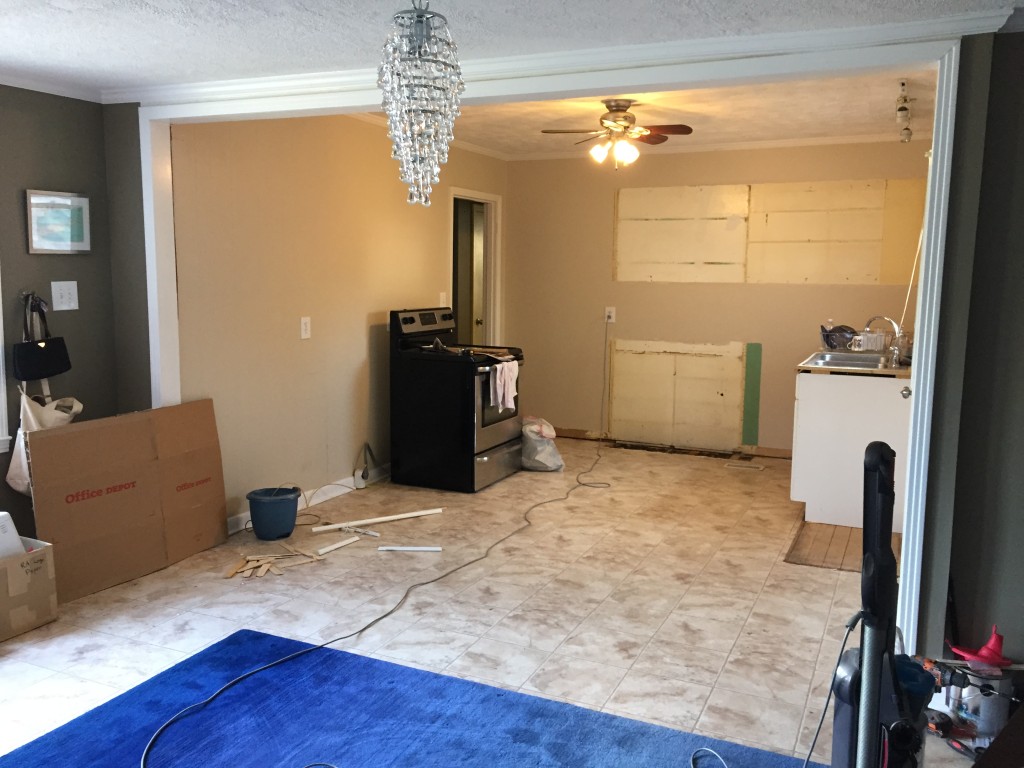
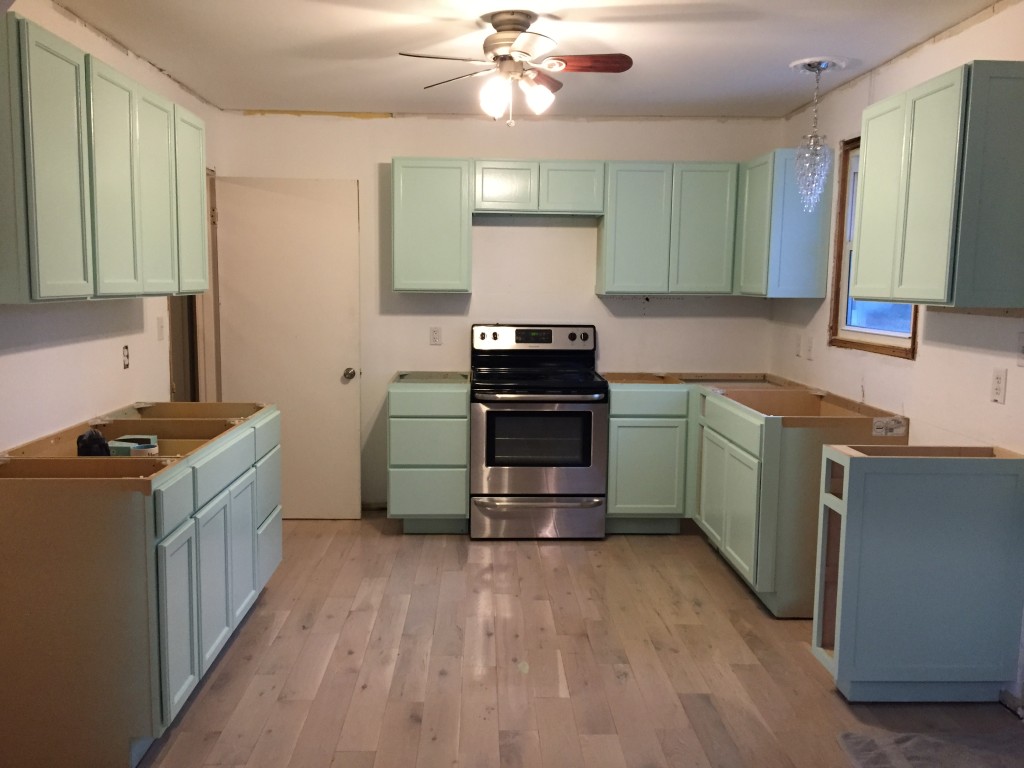
The floors are in and we are ready to install the cabinetry!!!  We started this project in November and are at a point where we can see the proverbial light at the end of the tunnel.  Before showing the pictures of how things are looking now, I want to talk about the cabinets.  As many of you following the blog know, I hit the “handy dude” jackpot when I married Rob.  He’s not only a sweet, kind, adorable guy, but he’s a cabinet maker who crafts beautiful furniture and cabinetry, plus has some great remodeling skills!  When deciding what we wanted to spend on this project and how nice the cabinets should be, we briefly threw around the notion of having him make the cabinets.  The materials alone would have eaten a significant part of our budget, plus the physical cost of having to construct these cabinets on top of his day job would have taking its toll on him.  Also, our house is in a neighborhood of small bungalow homes, so even though this endeavor will hopefully increase the value of the home, we didn’t want to put a $40,000 kitchen in a house that wouldn’t increase in value on that scale.

We made the reluctant decision to purchase unfinished pre-fab cabinets from Home Depot with the idea that Rob would add some custom details to them, finish them with a professional sprayer, and we would purchase quality hardware to make them look a little nicer.  I bought the cabinets at a time when they were 20% off in the store, plus I used discounted gift cards for the purchase.  I also wrote a letter to Home Depot after a horrible customer service experience, which resulted in us getting two cabinets for free.  The total cost of the cabinetry for our entire kitchen was $843 (excluding paint, hardware, and trim).

The old adage “you get what you pay for” has merit when it comes to most things, and in this case, cabinetry.  Even though we saved a crazy amount of money by purchasing pre-fab, we had many, many issues.  My true sentiment is that I would NEVER recommend these cabinets to ANYONE and I think that Home Depot as a company should be completely ASHAMED for selling this garbage in their stores.  Obviously, Rob has the experience required to fix the issues we found and he also had the skill to make two skinny cabinets to account for weird measurements in our space.  In addition to this, he added strips of wood to the end cabinets to create corners where the doors would actually open without hitting each other.  He added toe kicks to all the end cabinets and created paneled ends on the exposed sides, so the cabinets would actually have a professional, finished look to them.

In order to prep the cabinets for painting, we had to do the following:

  • Sand all surfaces.  These things say they come pre sanded, but there is no way in hell you could paint them straight out of the box.
  • Remove globs of glue that were showing on the doors.
  • Fill in all cracks, gaps, and repair corners that were chipped with wood filler.
  • When we took the drawer fronts off of the drawers, they literally FELL APART because there was no glue on the drawers!!  No glue!!!  So that means if we had filled these with anything heavy, the sides would have fallen open when the drawer was pulled out.  Rob added glue and then shot nails into all sides to secure the structure of each drawer.

IMG_7179

IMG_7180

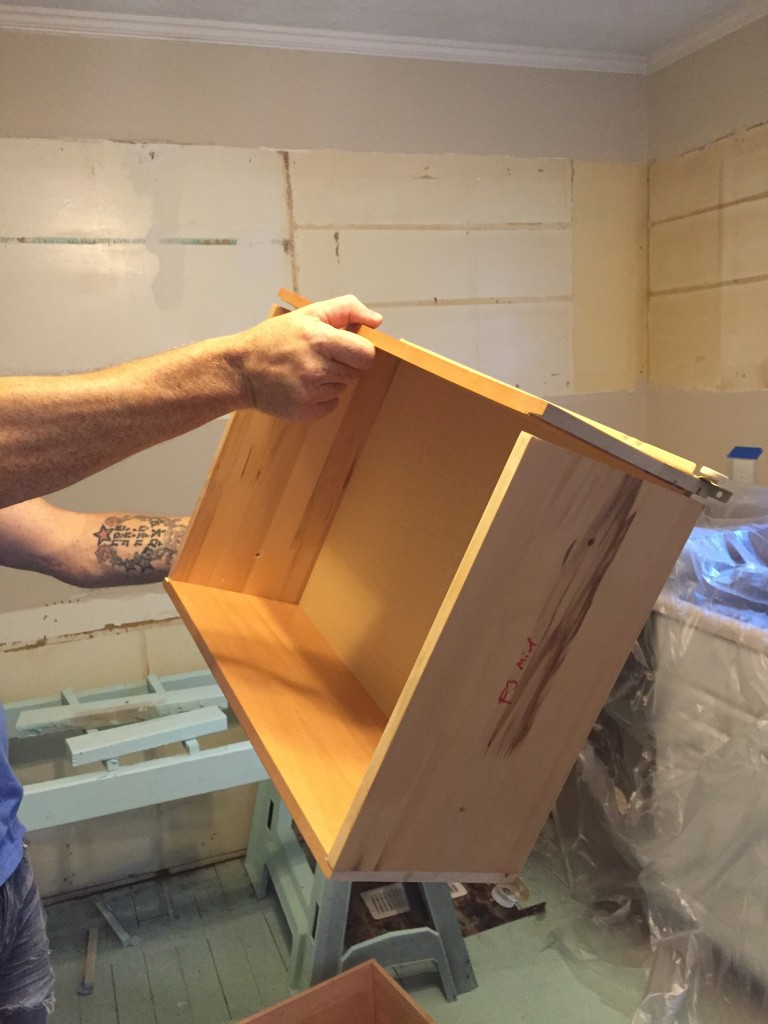
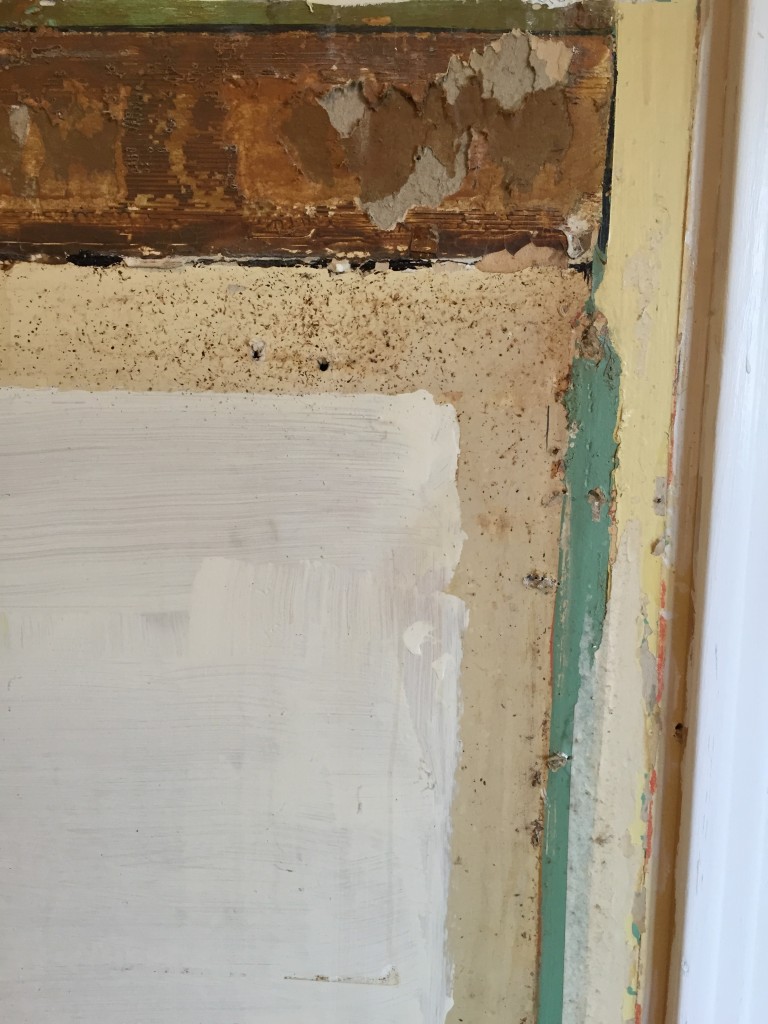
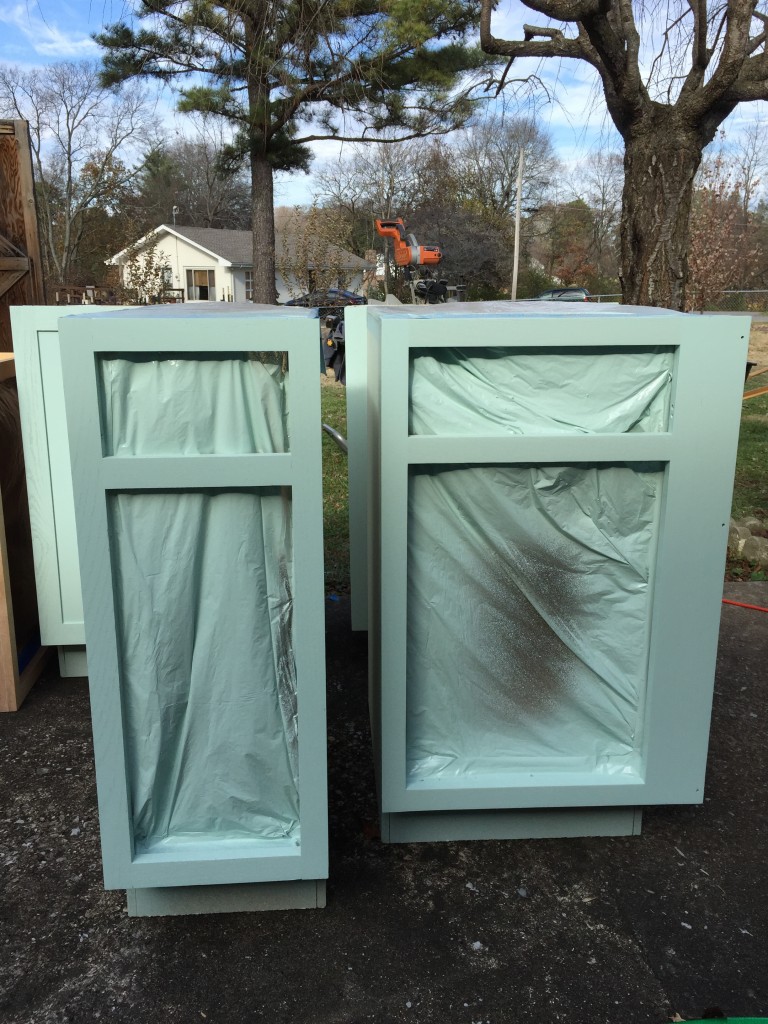
  • While we were picking up the cabinets with one of us on each side to carry them out to be painted, some of the boxes literally were coming apart in our hands.  A couple of the nailers, the part that you shoot a screw through to secure a cabinet to the wall, fell off in our hands, which means that had we hung the cabinet on the wall, it would have fallen off.  Rob restructured every cabinet, by adding glue and shooting more nails in the sides.  Below is an example of the stellar workmanship on the corners of the boxes.

IMG_7181

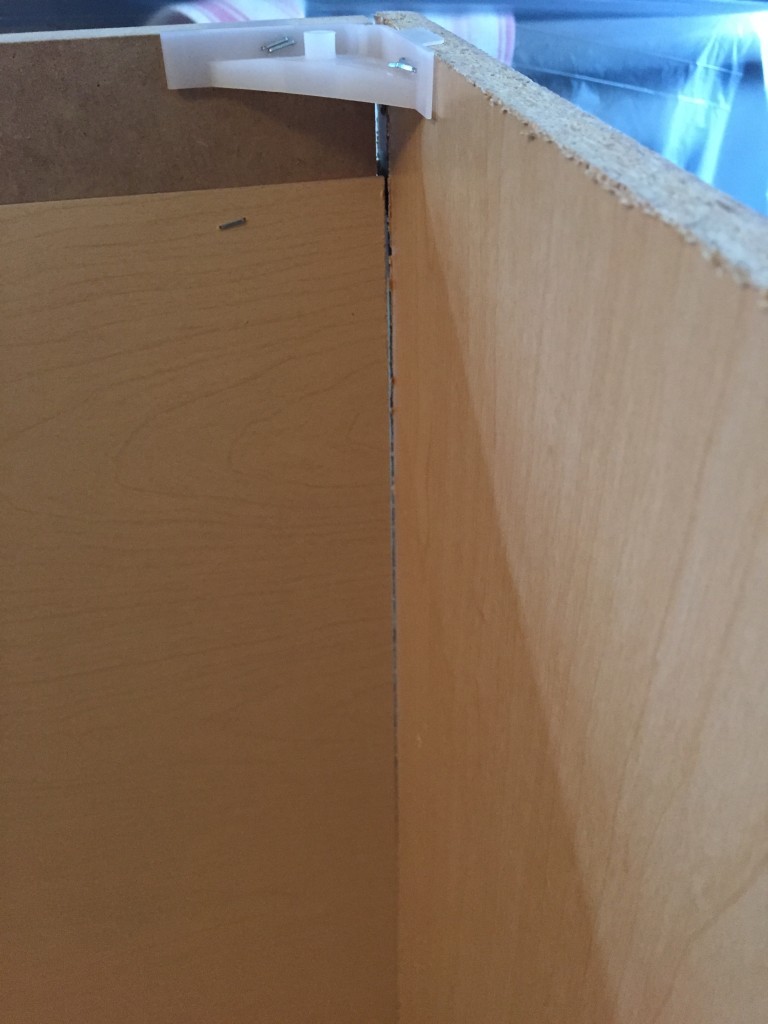
  • The backs of the cabinets are stapled on.  Stapled.  Got that?  So as we were installing some of the bottom cabinets, the backs just, you know, came off.  Rob glued and re-stapled to secure the backs to the cabinets.
  • Each cabinet only comes with ONE SHELF.  Older pre-fab cabinets came with two shelves and there may be some that still do, but this effectively halved our storage space, so Rob will be purchasing plywood to make additional shelves for every cabinet.

So, we paid $843 for our kitchen cabinetry (a great deal, right?!), but ended up putting many dollars worth of time and effort into these to make them suitable for our needs.  I’m grateful that they turned out as well as they did, but the frustration, time, labor, and additional materials we had to invest make them an item for any amateur DIYer to run from.  I do NOT recommend!

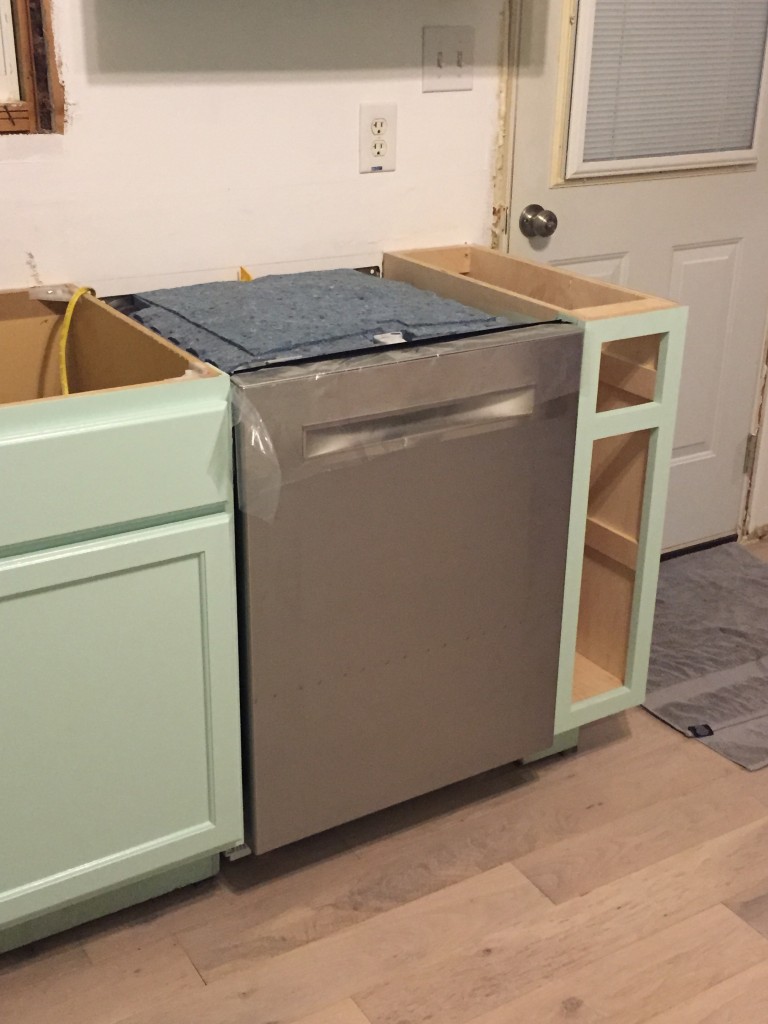
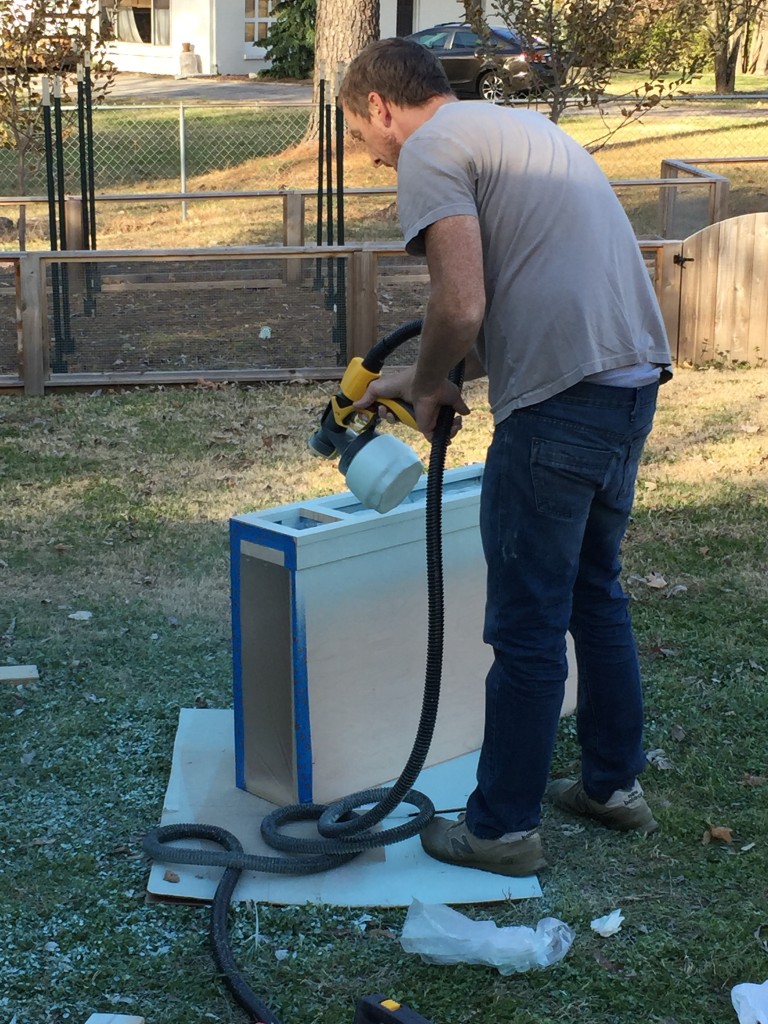
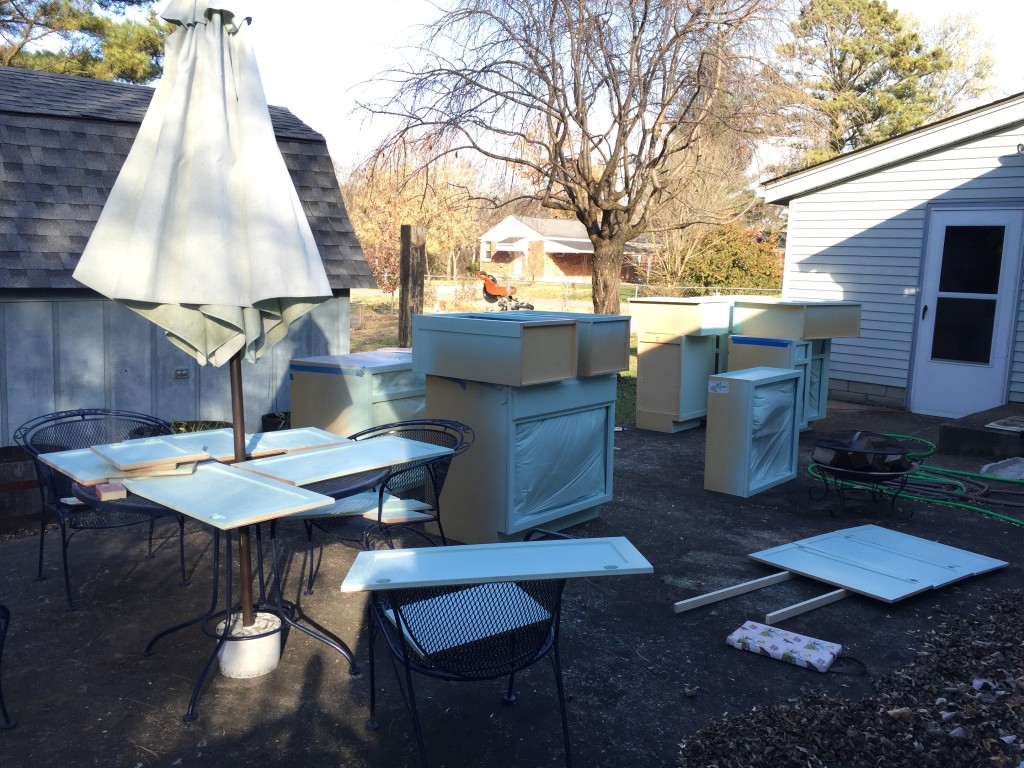
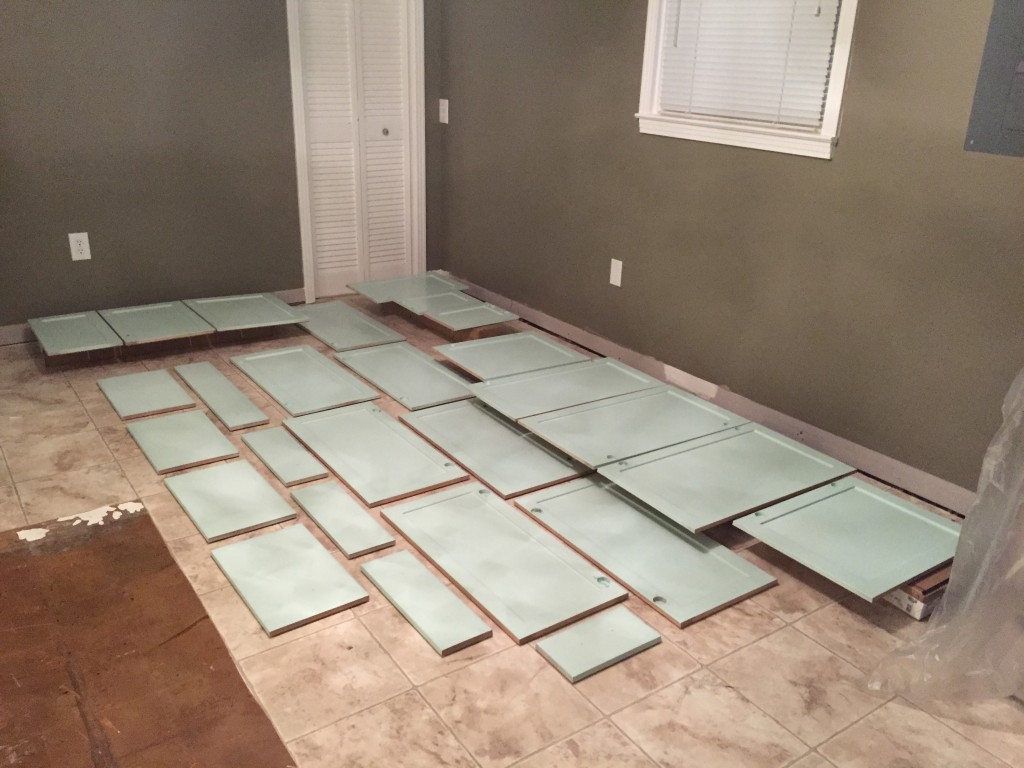
Back in November we took advantage of every day where the temperature was over 50 degrees until we finally had to move inside and set up shop.  We taped off the insides of each cabinet using blue tape and plastic sheeting.  Rob purchased a sprayer and used three coats of latex paint and primer.  The color we chose was Sherwin Williams “Breaktime,” for its obvious beachy feel and relaxing hue.

IMG_7011 IMG_7009 IMG_7006
IMG_7135
Once everything was ready to be installed, we brought the cabinets back into the house without them falling to pieces and began to attach them to the studs in the wall.  It took a whole day, but Rob’s measurements were just right and we now have more cabinetry and more drawers than we did before.  Once the additional shelves are added, all our stuff will fit and hopefully we’ll have room for a few more gadgets.
IMG_7856 IMG_7867

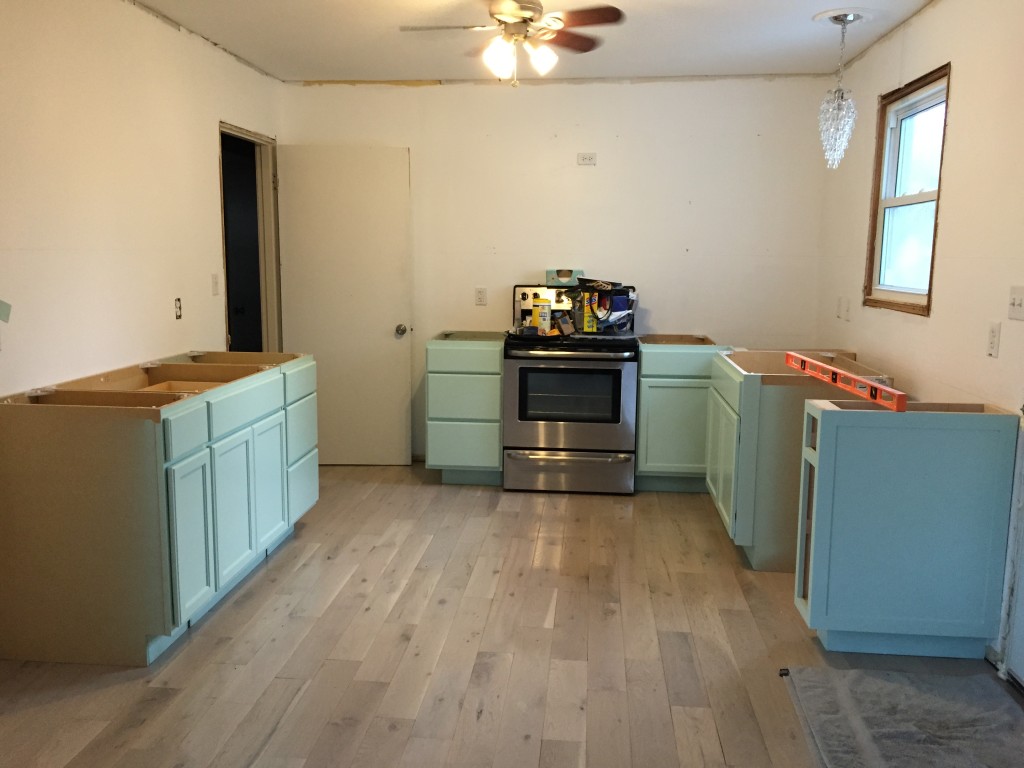
The countertop will be installed in a week and then we can have the plumber come and connect the dishwasher and sink fixtures.  A dishwasher!!!  Excuse me while I go freak out.

IMG_7872


Filed Under: House & Home Tagged With: cabinets, Home Depot, kitchen, remodeling, renovation

The Kitchen Takes Shape: We’re Floored!

March 9, 2015 by Leah Leave a Comment

I’ve been sick.  It’s been a good two years or so since I’ve been really sick and then this winter hit and down I fell into a rabbit hole of germs.  It started in the beginning of December when Rob and I got this weird 48 hour stomach thing.  Then the day after Christmas, probably the flu, for two weeks.  Then the week after the GRAMMYs.  My voice is still hoarse.  Seriously, I am ready for spring and fresh air filled with the smell of hyacinths and daffodils, and walks downtown in a t-shirt, and vegetable plants peaking tender green leaves out of the soil.  Nashville just dug itself out of a nasty ice storm that left inches of slippery mess on the roads.  While working from home I watched multiple cars spin out during the day, right in front of our house.  One of the neighbors told Rob that three or four times in the past a car has run the stop sign and hit a car in what is now our driveway.  Lovely.  All day long I just prayed the folks who don’t know how to drive in snow or ice would get the heck off our road and get stuck in their own driveways.  That’s right, people, hitting the gas and spinning your wheels as hard as they’ll go will not help you regain control on a slippery surface.

In the meantime, amidst illness, holidays, and days not spent in the wood shop, the kitchen has been slowly taking shape.  Once the electrical work was finished, it was time for drywall.  The studs were  covered and Rob built an archway between the kitchen and dining room.

IMG_7456 IMG_7455

Then there were the ceilings…plaster…old plaster that was poorly applied, cracking in spots, and just unsightly.  We were originally going to do a plank ceiling in the dining room, which I think would have looked lovely, but it would have eaten into our budget and taken a lot more work than simply installing drywall over the existing ceiling.  We rented a lift from Home Depot and got to work.  We started by finding the studs and marking chalk lines as guides for screws.

IMG_7497 IMG_7498 IMG_7504

This was not a fun job.  The rooms were out of square, so even though our lines were straight and the measurements were accurate, there was a lot of frustration finding the studs and then cutting slivers off the sheets with a razor knife.  I felt so bad for Rob.  I don’t know how his arms didn’t fall off.

IMG_7509 IMG_7515

Once the ceilings were in, we hired someone to help with the drywall mud (spackle) and the sanding to make everything smooth.  This was really helpful in finishing up a messy job that was dusty and miserable.  The ceilings and the walls look so nice and smooth, it makes such a big difference!  We used Curio Grey and plain old sunny Ultra Pure White on the walls to brighten the space.

Once the paint was dry, the floors were ready to be installed.  Let me tell you about the floors. We were originally going to use the old hardwoods in the house by sanding them and then painting them grey.  However, due to the black adhesive that covered the original wood, we opted to tear it out and replace with unfinished hardwoods that we would then sand and paint.  Rob headed to Southeastern Salvage to pick up the unfinished hardwood, and they had some really beautiful prefinished oak that was 5″ x 3/4″ with a light whitewash on it.  The price was right at $3.49/sq ft and we realized it would save us a ton of sanding, cleaning up, painting, and general mess, along with approximately two weeks of time.  This is also the price we would have paid for unfinished hardwood at Lumber Liquidators, so I am beyond relieved we didn’t go that route.  So is Rob!  Even though the color isn’t the grey we were originally planning on, this goes with the theme, looks a bit like light driftwood, and works well with the cabinet color we chose.

IMG_7847

We stapled the thermal underlayment to the subfloor.  Then, Rob nailed down some long boards in the middle of the arch as as guide for the direction in the kitchen.  Slowly but surely, the floor went in and by the end of the day, we had something to walk on.

IMG_7824 IMG_7830 IMG_7834 IMG_7849

I finally feel like I can see the light at the end of the tunnel.  With the floor in, we can begin installing the cabinets.  Once the kitchen layout is in, we can have the countertop vendor come and make the template.  Then the dishwasher can be hooked up, the sink and plumbing can be functional again, and we can finally start cooking!  This is happening!!!

Filed Under: House & Home Tagged With: flooring, kitchen, remodeling, renovation

Adventures In Flooring: Leveling Things Out

January 18, 2015 by Leah Leave a Comment

I just walked across the studs of our kitchen floor to come to the living room and sit with our frantic pets to start writing about what the past few weeks have been like.  I apologize in advance for the less than exciting pics of floor studs and general indoor construction.

People say, “Oh, you’re so lucky to have a guy who can build you a kitchen,”  “Oh, you are just sooooo lucky you’re getting a new kitchen,”  “You guys are sooooooooooooooo lucky you can do it yourselves and save tons of money.”  Blahbitty blah BLAAAAHHH!  While we are totally glad to be able to do a lot of this work ourselves, I will tell you this, whatever costs we are saving in labor are being paid for with bruised toes, bloody fingers, sore backs, occasional disagreements, and time, so much valuable time that might have been spent relaxing, doing something fun, going on a trip, or just enjoying the fact that we’re not working.  I know without a doubt, in the end it will all be worth it and we will love this kitchen!  DIY shows make these projects look so fun because they bring in a massive team of experts and friends who can whip out a kitchen in 3 days and it’s all free and those people are SO HAPPY…that is not reality, people.  I mean, maybe it is for those people, but we haven’t run into the cool Kitchen Crashers lady in Home Depot yet, so until then, we press on.

  • We have been using the guest room as our kitchen since just after Thanksgiving.  While it’s a blast to feel like we’re camping all the time, we have eaten lots of unhealthy meals out because it’s so much easier
    than cooking on a double burner and then washing dishes in the
    bathroom.
  • We decided to replace the entire kitchen floor due to the fact that the black mastic is extremely difficult to remove and the boards were not level.  We were really excited there was wood underneath the linoleum in the kitchen…this was short lived when we looked more in depth at what we were dealing with.
  • The kitchen has been gutted so we have no kitchen sink which means our main source of water is the bathroom sink.
  • We demoed the floor and one wall.  The supports inside the wall looked like a 4th grader measured and installed them.  Again, I don’t know what the people who owned this house before were thinking, but the workmanship is less than stellar.  We are fixing all of it.
IMG_7350

This is where we come to the crux of this week’s story…

There was a hump in the transition between the dining room and the kitchen.  Even though the sub floors were sort of even with each other, when they put the plywood on top of the pine in the dining room, it was not even with the wood in the kitchen, creating this weird hump.

IMG_7354

The joists in the dining room were sticking up a bit, so when you held a level on the joist and over the kitchen floor, the result was a big gap of space beneath the level, so we had to restructure the kitchen floor to make it level.  Since the dining room planks are otherwise level, we are going to leave them. I realize I just said “level” a lot, but it’s a big deal when you’re installing a floor.

Here is the original subfloor in the kitchen.  We’re planning to save these planks and repurpose them later on.

IMG_7391 IMG_7394

Restructuring the floor was not even a little bit fun.  2×6 planks were cut, glued, and nailed to the original joists at a height that made the floor level.  If you look in this picture you can see the new planks and how much higher they are than the old ones.

IMG_7408 IMG_7403

This will eliminate the hump between the dining room and kitchen and ensure that the cabinetry and appliances will sit properly on the floor.

Along with the planks going across the floor, smaller ones needed to be cut to go in between the new joists as support and a base to nail the subfloor to.

IMG_7413

Let me tell you, people, I am learning a lot.  I have learned that even though I desperately want to be helpful, there is only so much I can do.  I am able to bring tools to Rob when he’s standing elbow deep in floor studs.  I can carry the demoed materials out to his truck for disposal.  I hold levels and ends of measuring tapes while balancing above our crawl space.  I removed a ton of rusty nails from the old subfloor in hopes we can repurpose it on a wall in the dining room after it ages.  I shop vac the hell out of everything in an effort to keep the workplace clean and dust free.  But in reality, Rob is doing the heavy lifting here and parts of this have not been easy.

IMG_7428

My frustration has come in moments where I realize I am not strong enough to carry an enormous sheet of plywood with Rob.  I can barely lift some of his tools, let alone use them, but I now understand how they work and what they are used for.  I have learned that a box of nails costs about the same as a nice pair of shoes, which in my opinion is a total waste!  I met with the electrician to go over all our electrical needs and also obtained a quote for our quartz counter top.  Since knowledge is power, I am trying to learn as much as I can, be as supportive as I can when I am able to, and buy takeout so we don’t starve.

IMG_7433

Now we have a level floor!!!  This is wonderful because it was the hardest step of this project.  The electrician comes this week and we’re having outlets added in, the stove 220 outlet is being moved to another wall, and we’re adding an outlet for the dishwasher (major excitement here, people!).  Once that is finished, we can begin putting the drywall back up and making it look like a room again.

One resource that I continue to find helpful is Cardpool.  When I first bought this house, I was a huge fan of discounted gift cards.  Cardpool has saved us a lot of money on Home Depot cards.  I usually save an average of 10% on the cards, which covers the tax on everything we buy.  It’s extremely helpful!  We are doing this project on a budget.  While I think we’ll be really happy with the end result, this is not going to end up being some massively impressive Better Homes and Gardens kitchen.  It will be more functional, prettier, and better quality than what we were working with before.

To be continued…

Filed Under: House & Home Tagged With: flooring, kitchen, remodeling, renovation

The Kitchen Remodel Has Begun!

December 10, 2014 by Leah Leave a Comment

Well, folks, it’s started.  I’ve been threatening to write about this for a while now and here you have it.  Our kitchen is finally in progress!!!  When we got married, we didn’t do a registry because we don’t need anything, except to fix up our house, so our family and friends came through for us with lots of Lowes and Home Depot cards.  What a blessing to be able to say the people in our lives helped us build our home!

A couple of weekends ago we started finishing the cabinets, but I’ll save that for another post.  Today, we talk about demo.  On Saturday and Sunday we basically tore the place to pieces.  I’ve been packing up over the past several weeks, and let me tell you how depressing that is.  It felt like moving again, except we weren’t moving.  The bad thing about living in a small house is that you have no extra room.  You just can’t accumulate the way you would in a large home that has lots of extra storage, so as we were packing things up, finding space to put all of that stuff was a challenge.  Most of it ended up in the water heater room off the patio or in the shed.

Also, what do you do with appliances???  Well, we bought a dishwasher!  While this is probably the most exciting thing to happen to me of late aside from getting married, the joy is dimmed a bit when I stop to realize that its installation is still months away.  So we have a dishwasher in the shed, the stove will end up there as well, and then there’s the matter of the fridge.  Lord help us, this fridge has been a major pain in the a$$ since we got it.  I bought this thing directly from Whirlpool for a great deal but the first couple of days it shut down and the digital operating panel had to be replaced.  Within two years, it’s gone out on me again.  And of course when we moved the fridge into the guest room, after emptying all the contents and removing the doors, the thing decides to crap out on us after we plug it in.  Shoot me.  Rob kicked it a bunch, removed the panel cover, messed around with the wires, and cursed it back into submission.  With all our preserved food defrosting all over the floor, it roared back to life and we quickly dumped everything back in with a sigh of relief until it dies on us again.  I have low hopes for this fridge.

IMG_7104

Our guest room is now a makeshift kitchen.  The mattress is up against the wall, and all manner of end tables are serving as surfaces for a microwave, double burner, coffee maker, and utensils.  For someone who has grown rather fond of cooking lately, this is not ideal, but I’m grateful we have something we can use as an alternative to eating out every night.

You must understand that our kitchen and dining room are literally half of our house and we are doing almost all the work ourselves, so this is an undertaking, but hopefully one that will end up going smoothly.  We started by taking all the cabinets out.  There were three that we transferred into the laundry room so I finally have storage in there!  It’ll be a while before we get to this room, so we just put them up on top of the paneling for now.

IMG_7109 IMG_7103

A big concern/question we had was whether or not there was actually wood under the linoleum in the kitchen.  We know there isn’t in the dining room, but we were hoping to only have to replace the floor in there and not the entire kitchen as well.  Our first good sign…

IMG_7110

As the cabinets came off the wall, we discovered some of them weren’t even screwed into studs, so it’s nice that they managed to not fall down on us.  Also, there were layers of paint and wallpaper underneath that spoke to years of what must have been hideous re-dos.

IMG_7111

Once we got all the cabinets out, we were too curious about the wood situation not to pull up the linoleum in the kitchen.  We left the sink in for now so we can at least wash a few dishes and have some running water other than the bathroom sink.  We are going to create an arch out of this opening, extending the wall out 24 inches on the left side and a few inches on the right side.  This will define the rooms a little better, but still create flow and maintain the open feeling we like so much in here.

IMG_7113

We started by pulling up the seam between the kitchen and the dining room.  There is a bump along this line and we could never figure out exactly what was causing the floor to be un-level.  We assume there are two layers of plywood in the dining room.  As you can see, they used some sort of filler along that line to smooth out the gap.

IMG_7115

Most of the adhesive had stopped being sticky a long time ago, so this was pretty easy to pull up.

IMG_7116

TA-DAAAA!!!!!  We have wood!  It’s disgusting and covered in nasty icky gook, but that’s ok because we’ll be sanding and painting it, so this is a good thing.

IMG_7119

As we started to pull up the dining room floor, a horrible, nasty old person smell started to pervade the space.  Ew.  Enough for one weekend.

IMG_7120

That night I got really sick, lost my dinner, and have felt wretched for the past two days.  It’s probably something that’s going around, but hopefully we can get back at this soon enough.  For now I’ve been enjoying the Christmas tree and the company of the pets.  At least part of the house is still intact!

IMG_7070

Filed Under: House & Home Tagged With: kitchen, remodeling, renovation

« Previous Page
Next Page »

Copyright © 2025 · Foodie Pro Theme by Shay Bocks · Built on the Genesis Framework · Powered by WordPress